Tutorial VI: PWM Servo Control Demo
Modules Usage Tutorial
- How To Install Arduino IDE
- Tutorial I: Motor With Encoder Control Demo
- Tutorial II: Motor With Encoder Control Demo 2
- Tutorial III: Motor With Encoder Control Demo 3
- Tutorial IV: Motor Without Encoder Control Demo
- Tutorial V: ST3215 Serial Bus Servo Control Demo
- Tutorial VI: PWM Servo Control Demo
- Tutorial VII: IMU Data Reading Demo
- Tutorial VIII: SD Card Reading Demo
- Tutorial IX: INA219 Voltage And Current Monitoring Demo
- Tutorial X: OLED Screen Control Demo
- Tutorial XI Lidar and Publishing Lidar Topics in ROS2
- General Driver for Robots WIKI Main Page
PWM Servo Control
The General Driver for Robots board has a module for sending PWM signals. The PWM servo can receive the PWM signal by connecting the IO port on the board, so as to control the PWM servo by the driver board. The following provides a simple rotation demo for the PWM servo.
Demo
Upload Demo
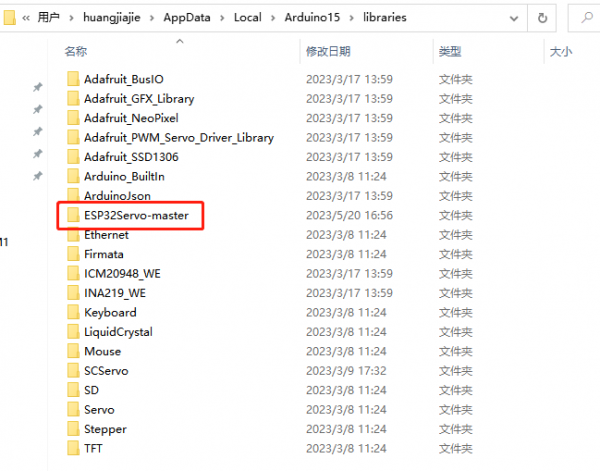
After downloading the dependency library ESP32Servo, unzip the downloaded file into the folder with path C:\Users\Username\AppData\Local\Arduino15\libraries.

After downloading the zip file, open pwmServo.ino, connect the multifunction driver board to the computer with a USB cable (the USB Type-C port of the multifunction driver board is inserted here), click "Tools" → "Ports", and then click "COM". Click on the newly appeared COM.

In Arduino IDE, click "Tools" → "Development Board" → "ESP32" → "ESP32 Dev Module". Upload the demo after selecting the board and port. After uploading the demo, connect the PWM servo and PWM signal servo interface, connect the XH2.54 power supply interface to the power supply, and run the demo, you can see the PWM servo will swing back and forth.
Demo Analysis
#include <ESP32_Servo.h>
Servo pwmServo;    //Create pwm object

#define PSERVO_PIN 4    //Set servo pin

int pwmServoChannel = 7;    //Set servo channel
int pwmServoInitPos = 90;    //Set the initial position of the servo

void pwmServoInit(){
  pwmServo.attach(PSERVO_PIN);    //Binding servo pins to pwm objects
}

void setup() {
  pwmServoInit();    //Initialize the servo
}

void loop() {
  pwmServo.write(50);    //Set the servo position to 50 degrees
  delay(1000);
  pwmServo.write(90);    //Set the servo position to 90 degrees
  delay(1000);
}