
Template: ZED-F9P GPS-RTK HAT Guide
Dimension

Working With Windows PC
Rover
Rover means that use the ZED-F9P GPS-RTK HAT as a rover, connect and receive RTCM3 data streams from base station providers for high precision centimeter-level positioning.
Base Station Service Providers
1. You need to apply for a reference base station service from a local institution. For example, if you are in the USA, you need to apply from UNAVCO, here we use the Hong Kong Geodetic Survey Services to test in China.
1) Download and install the u-center software.
2) Connect the ZED-F9P GPS-RTK HAT to PC and install drivers according to the prompt, after installing, open the u-center software and select the COM port.
3) Choose Receiver --> NTRIP and type the parameter below:
Note: we recommend the distance between the station and the rover should be shorter than 50 km.
Address:  landsd-gncaster.realtime.data.gov.hk
Port:  2101
Username:  psi_user
Password:  psi
4) Then click Update source table, choose T430_32 in the NTPIP mount point drop-down box, and click OK to save and run the RTK service.
5) After connecting NTRIP, the connect status of NTRIP is shown at the bottom of the u-enter. The RTK indicator keeps lighting if the module is in Fixed status and flashing in Float status.

Figure 1

Figure 2

Figure 3

Figure 4

Figure 5


2. Use ZED-F9P GPS-RTK HAT to establish CORS (Continuous Operational Reference System), provide RTCM3 data stream for other equipment, and realize real-time centimeter-level positioning of the equipment, refer to #Stationary Base
Moving Base and Rover
Moving Base and Rover refers to the use of two ZED-F9P GPS-RTK HAT modules to achieve dynamic high-precision positioning and guidance functions, which are widely used in automatic operation systems such as smart cars and precision agriculture, as well as scene applications such as target following in film and television shooting.

1. Moving base (hereafter call MB module) setting.
1) Open the u-center, and connect the MB module, choose View --> Configuration View Option(You can also press Ctrl+F9).
2) Choose the MSG (Messages) Option, Enable the RTCM3 data streams to UART2:
RTCM 1077
RTCM 1087
RTCM 1097
RTCM 1127
RTCM 1230
RTCM 4072.0
RTCM 4072.1
3) Save the setting. It uses a button battery for RAM parameter storage by default. As Figure 2.
4) After the MB module and Rover module are set up, use DuPont cable to connect the UART2 interfaces of the two modules (note that the TXD of the MB Module is connected to the RXD of the Rover module) or use the wireless module to transparently transmit the RTCM3 data stream from the MB Module to the Rover module. As Figure 3.
5) After the connection is completed, the u-center connected to the MB module opens the NTRIP client service, please refer to the chapter Rover --> Other Reference #Base Station Service Providers.

Figure 1

Figure 2

Figure 3


2. Rover(Hereafter call Rover module) Setting
1) Open another u-center software and connect to the Rover module, choosing the correct COM port.
2) Choose View --> Configuration View Option (or Press Ctrl+F9),choose MSG(Messages) and NAV_RELPOSNED, check the UART1 option. As Figure 1.
3) Choose CFG, select Save current configuration, and save. It uses a button battery for RAM parameter storage by default.
4) After setting up the MB module and the Rover module, connecting the UART2 interfaces of two modules (note that the TXD of the MB Module is connected to the RXD of the Rover module), open the u-center which is connected to the Rover module, choose View --> Messages View.
5) Find and click the UBX --> RELPOSNED option to check and verify the Moving Base application. When the MB module enters the Fix positioning, the Rover module receives the RTCK data stream of the MB module in real-time, and also enters the Fix positioning and outputs the centimeter-level positioning relative to the MB module. The steering angle, as shown in Figure 3 below, Length and Heading, where the size of Length is the distance between the two antennas, and the accuracy is 1cm. Users can move the Rover module antenna in real-time and measure the distance to the MB module antenna and work with the Length on the u-center. In comparison, the centimeter-level positioning function of ZED-F9P is verified from the side. The heading indicates the angle between the two antennas. The user can move the Rover module antenna and observe the change of Heading.

Figure 1
Figure 2
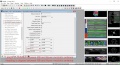
Figure 3


Stationary Base
Stationary Base means that us ZED-F9P GPS-RTK HAT as a base station, provide observation data of centimeter-level positioning accuracy relative to the base station for other rover stations. The service of UNAVCO or Hong Kong Geodetic Survey Services which mentioned above work in the same way, they build base stations in various regions send observation data streams to nearby mobile stations through the Internet to achieve centimeter-level positioning of nearby mobile stations.
1. Go to Hong Kong Geodetic Survey Services, make the ZED-F9P GPS-RTK HAT to RTK Fixed status, and get the positioning coordinates. Then configure the Stationary Base
1) Get the RTK Fixed coordinates of ZED-F9P GPS-RTK HAT, refer to Rover chapter, the obtained RTK Fixed coordinates are shown in Figure 1.
2) Set the Fix Position of ZED-F9P GPS-RTK HAT, as Figure 2.
3) Setup local RTCM3 data stream service by NTRIP Server/Caster, the ZED-F9P GPS-RTK HAT should be set as Stationary Base, as Figure 3.
4) Use another Rover to connect NTRIP Server and get RTCM3 data streams, as Figure 4.

Figure 1

Figure 2

Figure 3

Figure 4


2. After obtaining the positioning coordinates of the local base station by PPP calculation, set the ZED-F9P GPS-RTK HAT to Stationary Base.
Refrence1
Refrence2
Working with Raspberry Pi
Rover
1. c codes
c codes use the Qianxun server, which can only be available in the China area.
2. python codes
The user needs to apply for an RTCM data stream service account from the local organization, fill in as shown in the figure below, and run the routine to perform centimeter-level positioning.
2.1 Restart the Raspberry Pi after enabling the hardware serial port.
2.2 Connect the GNSS multi-frequency antenna to the HAT after power off, then connect the HAT to the Raspberry Pi.
2.3 Use minicom to check whether the HAT outputs NMEA data.
2.4 Download the routine and fill in the account information as shown in the figure and run the demo.
mkdir zed-f9p && cd zed-f9p
wget https://files.waveshare.com/upload/d/d4/ZED-F9P_GPS-RTK_HAT_Demo.zip
unzip ZED-F9P_GPS-RTK_HAT_Code.zip
cd python
sudo pip3 install pynmeagps
sudo python3 main.py -u psi_user -p psi -2 landsd-gncaster.realtime.data.gov.hk 2101 T430_32