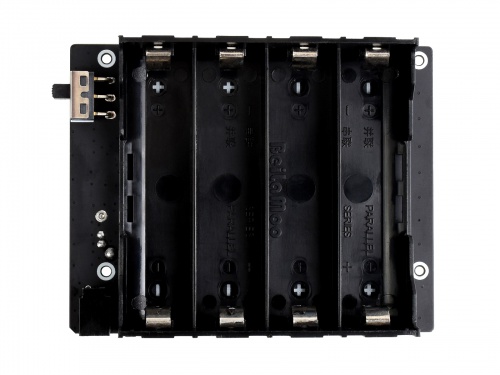
Template: UPS-Power-Module-B
Features
- I2C bus communication, monitoring the batteries voltage, current, power, and remaining capacity in real time
- Multi battery protection circuits: over charge/discharge protection, over current protection, short circuit protection, and reverse protection, along with the equalizing charge feature, *more safe and stable
- Onboard 5V regulator, up to 5A (MAX) continuous output current, more sufficient power source for Jetson Nano
- Batteries warning indicators, easy to check if the battery is connected correctly
Specifications
- Output Voltage:5V
- Charger:8.4V 2A
- Conttrol bus:I2C
- Supported battery:18650 Li battery (NOT included)
- Dimension:100mm × 79mm
- Mounting hole:2.5mm
Hardware


The 8.4V interface is the charging interface, which uses an 8.4V 2A power supply for charging. 5V OUT is a USB male port that can output 5V power. The 0FF/ON silkscreen is the power switch silkscreen.
Note 1: Please turn the power switch to OFF before you connect the battery, or the board may be damaged because of shorting. After installing, make sure that the Pogo pins are completely aligned with the pin header before turning on the power. If the Pogo pins are not conducting, you can press the pin to loosen it or use a knife to scratch off the oxide layer of the pin header.
Note 2: The board may not work when you mount the batteries for the first time, you need to press the Boot button to activate the circuit.
Note 3: When connecting the battery for the first time, you need to pay attention to whether the WARNING LED is on. If the LED is on, it means that the corresponding battery is connected reversely. Prohibit charging when the battery is connected reversely
Note 4: It is recommended not to exceed 4A when working for a long time and working with high current. It will heat up when working at 5A for a long time. Pay attention to heat dissipation..
Note 5: To use the power supply configured with the product to charge, using other power sources may cause the product to be damaged due to too large and unstable output power ripple.
How to use
You should connect the UPS Power Module with your Jetson Nano Developer Kit first. Set the power switch into OFF and then mount the batteries. Please check the warning indicators when you mount the batteries, make sure that all the batteries are mounted in the correct way, otherwise, the Jetson Nano may be damaged.
Open a terminal and install the display code by the following command. The codes are used for display information on OLED like the voltage, current, etc.
sudo apt-get install python3-smbus
wget https://www.waveshare.com/w/upload/a/a2/UPS_Power_Module_B.zip
unzip UPS_Power_Module_B.zip
cd UPS_Power_Module_B
python3 INA219.py
The information printed should be as below

Note: if the current value is negative, it means that the batteries are feeding the Raspberry Pi. If the current value is positive, it means that the batteries are charging.