
Difference between revisions of "Template:PAJ7620U2-Gesture-Sensor-Manual"
From Waveshare Wiki
| Line 16: | Line 16: | ||
==Interface== | ==Interface== | ||
{|class="wikitable" | {|class="wikitable" | ||
| − | |PIN||SYMBOL||Description | + | |'''PIN'''||'''SYMBOL'''||'''Description''' |
|- | |- | ||
|1||VCC||3.3V/5V | |1||VCC||3.3V/5V | ||
Revision as of 07:44, 27 May 2020
Features
- Based on PAJ7620U2 sensor, directly recognizes 9 basic gestures, supports gesture interrupt output
- Embedded infrared LED and optical lens, be able to work in low-light even dark environment
- I2C interface, requires only two signal pins to control
- Onboard voltage translator, compatible with 3.3V/5V logic level
Specification
- Operating voltage: 3.3V/5V
- Communication interface: I2C
- Recognition distance: 5cm ~ 15cm
- Supported gestures: up, down, left, right, forward, backward, clockwise, anticlockwise, shake
- Recognition rate: 240Hz
- Recognition angle: 60° (diagonal)
- Ambient light immunity: <100k Lux
- Dimensions: 20mm × 20mm
- Mounting hole size: 2.0mm
Interface
| PIN | SYMBOL | Description |
| 1 | VCC | 3.3V/5V |
| 2 | GND | Ground |
| 3 | SDA | I2C data pin |
| 4 | SCL | I2C clock pin |
| 5 | INT | External interrupt pin |
How to use it
We provide demo codes for easy testing, you can download the demo codes from #Resources
Unzip the archive downloaded to get the codes.
Raspberry Pi
- Insert the Micro SD card of Raspberry Pi to host PC.
- Copy the RapberryPi folder to boot directory of the micro SD card.
- Start your Raspberry Pi with the Micro SD card
- You can find that the RaspberryPi codes are saved in the BOOT directory.

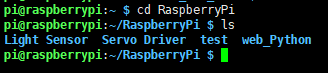
- Copy the folder to home directory
sudo cp -r /boot/RaspberryPi/ ./
sudo chmod 777 -R RaspberryPi/
cd RaspberryPi

- Install libraries


- BCM2835:
wget http://www.airspayce.com/mikem/bcm2835/bcm2835-1.64.tar.gz
sudo tar zxvf bcm2835-1.64.tar.gz
cd bcm2835-1.64
sudo ./configure
sudo make
sudo make check
sudo make install
- Install wiringPi
sudo apt-get install git
sudo git clone git://git.drogon.net/wiringPi
cd wiringPi
sudo ./build
- Install python
sudo apt-get install python-pip
sudo pip install RPi.GPIO
sudo pip install spidev
sudo apt-get install python-imaging
sudo apt-get install python-smbus
sudo apt-get install python-serial
- Enable I2C
sudo raspi-config
- Choose Interfaceing Options -> I2C -> Yes
- Hardware connection
The colors of wires may be different, please connect it according to the silk screen printing.
| Gesture Sensor | Raspberry Pi (Board) | Raspberry Pi(BCM2835) |
|---|---|---|
| VCC | 3.3V | 3.3V |
| GND | GND | GND |
| SDA | 3 | P2 |
| SCL | 5 | P3 |

- Run the codes
- BCM2835 codes
cd ~/RaspberryPi/bcm2835/
cd Gesture
sudo make
sudo ./PAJ7620U2
- wiringPi codes
cd ~/RaspberryPi/wiringPi
cd Gesture
sudo make
sudo ./PAJ7620U2
- Python codes
cd ~/RaspberryPi/python
cd Gesture
sudo python PAJ7620U2.py
- Expecture result
- Gesture detecting

- Object detecting

STM32 examples
The STM32 examples is based on Waveshare XNUCLEO-F103RB whose chip is STM32F103RB, HAL libraries.
- Hardware connection
Connect the sensor to STM32 board according the table, then connect USB to UART interface of XNUCLEO board to host PC.
| Gesture Sensor | STM32 |
|---|---|
| VCC | 3.3V/5V |
| GND | GND |
| SDA | PB9 |
| SCL | PB8 |
- Open the project (STM32 demo codes) with Keil software
- Compile it and program to board
- Expectre result
- Run serial assistance software, set bard rate to 115200
- Gesture Detecting:

- Obeject detecting:

Arduino
The demo codes provide is based on the Arduino UNO
- Hardware connection
| Gesture Sensor | Arduino |
|---|---|
| VCC | 5V |
| GND | GND |
| SDA | 27 |
| SCL | 28 |
- Open the codes by Arduino IDE
- Compile and upload to Arduino Board
- Expected result
- Gesture detecting

- Object detecting
