Template: Eink-disp-103-manual
From Waveshare Wiki
Features
- 10.1inch e-Paper, 1872x1404 resolution (225DPI)
- This paper-like display has no blue light, it is eye care.
- Display type: Passively relfective and require ambient light for reading.
- Supports mode/contrast adjust
- Aluminum alloy CNC enclosure
- Supports Raspberry Pi/Jetson Nano/PC
Hardware desciption
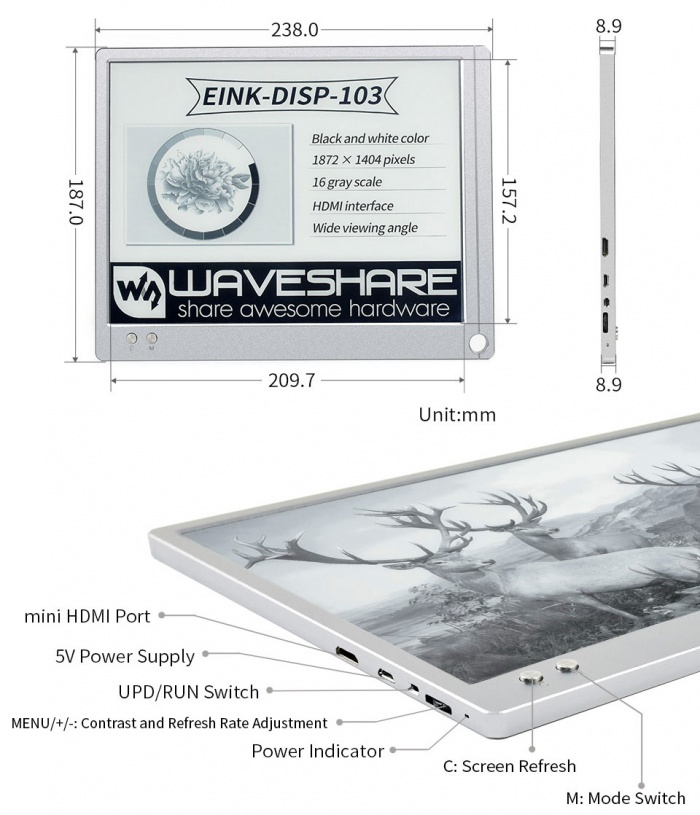
- mini HDMI Port: You can connect the EINK-DISP-103 (called "the display" hereafter) to the master device by HDMI cable. The display can only work with 1872x1404 resolution
- 5V Power supply: The display requires at least 5V/1.5A power input, a 5V/3A power adapter is provided in the package.
- UPD/RUN Switch: By default, you should turn the switch onto the RUN side (close to the power port) for displaying, You can turn it onto the UPD side (close to the contrast adjustment) for firmware update.
- Contrast Adjustment: To adjust the contrast, you should first press the button, then roll the button upward/downward, finally press the button again to confirm. The display will do a full update when you change the contrast to clear the ghost.
- Power Indicator: The indicator is used to indicate the status of the display
- C button: This button is used to clear the display. You can press this button to clear the ghost or wakeup it from sleep mode
- M button: This button is used to change display modes. The display supports three modes (A2+/GC16?A2)
- A2+: This mode uses Floyd-Steinberg dithering algorithms, to let the display simulate gray display. The update speed is fast and it is suitable for daily use. The disadvantage is that its ghost is more than A2
- GC16: Supports 16 grays. In this mode, you can get the best display effect, less ghost, however, slowest the update rate. It is suitable for displaying still pictures.
- A2: A2 mode only supports Black and White color. The update rate of A2 is fastest, you can use it for editing and coding.
You can adjust the mode and contrast according to your user-experience.
Connect to PC
Hardware connection
- Connect the 5V/3A power adapter to Power interface of the display
- Connect the HDMI interface of the display to PC
The display will display after connecting.
Note: If your PC only has DP or type C interface, you should connect an adapter firstly. To use the display, we recommend you to first connect the Power adapter for EDID reading.

