
Difference between revisions of "Raspberry-Pi-400"
(Created page with "{{infobox item| |img=400px|link=https://www.waveshare.com/raspberry-pi-400.htm|Raspberry Pi 400 Kit |category=:Category:Raspberry Pi|Raspberr...") |
|||
| Line 3: | Line 3: | ||
|category=[[:Category:Raspberry Pi|Raspberry Pi]] | |category=[[:Category:Raspberry Pi|Raspberry Pi]] | ||
|{{#urlget:amazon|default}}=display | |{{#urlget:amazon|default}}=display | ||
| − | |website_cn=[ | + | |website_cn=[https://www.waveshare.net/shop/Raspberry-Pi-400-US-Kit.htm 中文官网] |
| − | |website_en=[https://www.waveshare.com/raspberry-pi- | + | |website_en=[https://www.waveshare.com/raspberry-pi-400.htm Website] |
}} | }} | ||
| + | <div class="tabber"> | ||
| + | <div class="tabbertab" title="Instroduction"> | ||
| + | == Features == | ||
| + | *Raspberry Pi 400 incorporates a purpose-built board based on Raspberry Pi 4. portable. You can use it as a mini-PC by combining a Mouse and display. | ||
| + | *CPU:1.8GHz ARM Cortex-A72(Pi4为1.5GHz) | ||
| + | *RAM:4GB LPDDR4-3200 | ||
| + | *Connectivity: | ||
| + | **Dual-band (2.4GHz and 5.0GHz) IEEE 802.11b/g/n/ac wireless LAN; | ||
| + | **Bluetooth 5.0, BLE; | ||
| + | **Gigabit Ethernet; | ||
| + | **2 × USB 3.0 and 1 × USB 2.0 ports; | ||
| + | *Video&Sound:2 × micro HDMI ports (supports up to 4Kp60) | ||
| + | *DIMENSIONS: 286 mm × 122 mm × 23 mm (maximum) | ||
| + | |||
| + | == Interfaces == | ||
| + | [[File:Raspberry-Pi-400-details-15.jpg|700px]] | ||
| + | |||
| + | ·Type-C Interface: Power interface, require 5V/3A power adapter. | ||
| + | |||
| + | ·40PIN GPIO: Standart 40PIn GPIO for accessories. | ||
| + | |||
| + | ·Micro SD card slot: For operating system and data storage | ||
| + | |||
| + | ·Micro HDMI Interface: Support dual-displays 4K video output. | ||
| + | |||
| + | [[File:Raspberry-Pi-400-3.jpeg|1000px]] | ||
| + | </div> | ||
| + | <div class="tabbertab" title="Resources"> | ||
| + | |||
| + | </div> | ||
| + | <div class="tabbertab" title="FAQ"> | ||
| + | {{FAQ|How to configure the touchscreen with dual dispalys?| | ||
| + | 1.Open a terminal and input command: xrandr, and check the HDMI-ID of main display.; | ||
| + | |||
| + | [[File:Pi4-conf-touch-1.png|600px]] | ||
| + | |||
| + | 2.Open a terminal and input command: xinput, to check the touch ID of main display; | ||
| + | |||
| + | [[File:Pi4-conf-touch-2.png|600px]] | ||
| + | |||
| + | 3.Run the command: xinput map-to-output <touch ID> <HDMI-ID> | ||
| + | |||
| + | (The ID value should be changed according to the actual ID checked. for example: xinput map-to-output 7 HDMI-1 ) | ||
| + | |||
| + | [[File:Pi4-conf-touch-3.png|600px]] | ||
| + | |||
| + | 4.If you want to configure the touchscren and save the setting, you have to set it to auto start. | ||
| + | sudo nano /etc/xdg/lxsession/LXDE-pi/autostart | ||
| + | |||
| + | Add the line: xinput map-to-output 7 HDMI-1 | ||
| + | |||
| + | Note that You need to change the ID and reboot Raspberry Pi. | ||
| + | |||
| + | [[File:Pi4-auto-start-4.png|600px]] | ||
| + | |||
| + | |||}} | ||
| + | |||
| + | </div> | ||
| + | |||
| + | <div class="tabbertab" title="Support"><br />{{Service00}}</div> | ||
Revision as of 07:27, 23 December 2020
| ||
Features
- Raspberry Pi 400 incorporates a purpose-built board based on Raspberry Pi 4. portable. You can use it as a mini-PC by combining a Mouse and display.
- CPU:1.8GHz ARM Cortex-A72(Pi4为1.5GHz)
- RAM:4GB LPDDR4-3200
- Connectivity:
- Dual-band (2.4GHz and 5.0GHz) IEEE 802.11b/g/n/ac wireless LAN;
- Bluetooth 5.0, BLE;
- Gigabit Ethernet;
- 2 × USB 3.0 and 1 × USB 2.0 ports;
- Video&Sound:2 × micro HDMI ports (supports up to 4Kp60)
- DIMENSIONS: 286 mm × 122 mm × 23 mm (maximum)
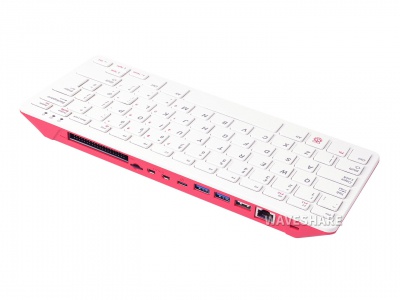
Interfaces

·Type-C Interface: Power interface, require 5V/3A power adapter.
·40PIN GPIO: Standart 40PIn GPIO for accessories.
·Micro SD card slot: For operating system and data storage
·Micro HDMI Interface: Support dual-displays 4K video output.

1.Open a terminal and input command: xrandr, and check the HDMI-ID of main display.;

2.Open a terminal and input command: xinput, to check the touch ID of main display;

3.Run the command: xinput map-to-output <touch ID> <HDMI-ID>
(The ID value should be changed according to the actual ID checked. for example: xinput map-to-output 7 HDMI-1 )
![]()
4.If you want to configure the touchscren and save the setting, you have to set it to auto start. sudo nano /etc/xdg/lxsession/LXDE-pi/autostart
Add the line: xinput map-to-output 7 HDMI-1
Note that You need to change the ID and reboot Raspberry Pi.
