NEO-M8T GNSS TIMING HAT
| ||
Working with windows
1. Download and install u-centersoftware, then open the u-center
2. Set the jumpers in A area, connect GNSS antenna,Put the receiver of the antenna in an open area outside for receive GPS signal, Connect the Module to PC by Micro USB cable
3. Note that you need to set the side of the antenna without sticker upward, check the COM port in Device Manager. Use the u-center to connect MAX-M8Q by select the COM port and select auto baud rate.
4. Enable 3D mode and export the file by selecting File -> Database Export -> Google Map Html.
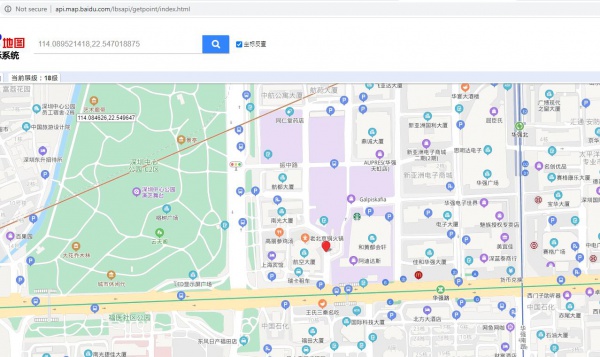
5. Download Text_Release software and unzip. Open the file by Chrome, then import the HTML file which we saved above to check the position.
6. For detailed information about the u-center software, please refer to User guide


Working with RaspberryPi
Hardware connection
| PIN | Raspberry Pi(BCM) | Raspberry Pi(WiringPi) | Description |
| 5V | - | - | 5V Power input |
| GND | - | - | Ground |
| RXD | P14 | P15 | Receive pin of UART |
| TXD | P15 | P16 | Transmit pin of UART |
| SDA | P2 | P8 | SDA pin of I2C |
| SCL | P3 | P9 | SCL pin of I2C |
| PPS | P18 | P1 | PPS pin of Module |
| INT | P27 | P2 | Wakeup pin, low active |
Enable UART interface
Open a terminal and run the following commands
sudo raspi-config
#Choose Interfacing Options -> Serial -> No -> Yes
sudo reboot
Libraries installation
- Install wiringPi
sudo apt-get install wiringpi
wget https://project-downloads.drogon.net/wiringpi-latest.deb
sudo dpkg -i wiringpi-latest.deb
gpio -v
# Check the revision of libraries, it should be 2.52.
- Install Python libraries
sudo apt-get update
sudo pip install RPi.GPIO
sudo apt-get install python-serial
sudo apt-get install gpsd gpsd-clients python-gps
- Modify gpsd
#Open gpsd file
sudo nano /etc/default/gpsd
#Change the lines below and save
USBAUTO="false"
DEVICES="/dev/ttyS0"
GPSD_OPTIONS="/dev/ttyUSB0"
- Donwload demo codes
mkdir ~/Documents/MAX-XXX_GNSS_HAT_Code
cd ~/Documents/MAX-XXX_GNSS_HAT_Code/
wget https://www.waveshare.net/w/upload/0/0f/MAX-XXX_GNSS_HAT_Code.zip
unzip MAX-XXX_GNSS_HAT_Code.zip
wiring Example
...
python Examples
Enter the folded rand run the following commands:
cd ~/Documents/MAX-XXX_GNSS_HAT_Code/RaspberryPi/python/coordinate_converter
sudo python3 main.py
Working with STM32
Hardware connection
| PIN | XNUCLEO-F103RB | Description |
| 5V | - | 5V power input |
| GND | GND | Ground |
| RXD | P9(TX) | Receive pin of UART |
| TXD | P10(RX) | Transmit pin of UART |
HAL examples
- Download the demo codes
- Unzip and go into the directory of STM32 example
- Open the STM32 project by Keil software
- Compile and download the code to the XNUCLEO-F103RB board.
- Connect the UART2 of the XNUCLEO-F103RB board to PC and check the debug information by Serial Port Utility
Working with Arduino
...
Expected result
- 1. Cloudy day
- 2. Rain day


