
Difference between revisions of "9.7inch e-Paper HAT"
| Line 91: | Line 91: | ||
tar zxvf IT8951.tar.gz | tar zxvf IT8951.tar.gz | ||
cd IT8951 | cd IT8951 | ||
| + | make clean | ||
make | make | ||
| − | ./IT8951 0 0 01.bmp | + | sudo ./IT8951 0 0 01.bmp |
</pre> | </pre> | ||
Revision as of 04:44, 26 October 2018
| ||
| ||

Note
9.7inch e-Paper is big size screen, the glass panel and FPC is fragile, please be careful when use it for developing. we recommend you to reinforce the FPC with scotch tape when developing.
There are two version, one is raw panel and another is HAT version. Driver board (IT8951) is required for raw panel, if you are the first time to buy this e-paper, recommend you to choose HAT version which come with the driver board.
Introduction
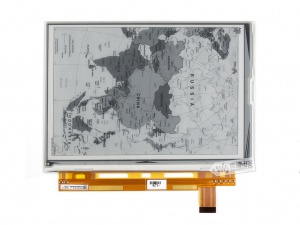
9.7inch E-Ink display HAT for Raspberry Pi, 1200×825 resolution, 16 gray scale, USB/SPI/I80/I2C interface
| More |
Features
- No backlight, keeps displaying last content for a long time even when power down
- Low power consumption, basically power is only required for refreshing
- Compatible with Raspberry Pi Zero/Zero W/Zero WH/2B/3B/3B+
- USB/SPI/I80/I2C interface, for connecting with host boards like Raspberry Pi/Nucleo, etc.
- Comes with development resources and manual (examples for Raspberry Pi/STM32)
Specifications
- Operating voltage: 5V
- Interface: USB/SPI/I80/I2C
- Outline dimension: 218.8mm × 156.425mm × 1.15mm
- Display size: 202.8mm × 139.425mm
- Dot pitch: 0.169 × 0.169
- Resolution: 1200 × 825
- Display color: black, white
- Gray scale: 2-16 (1-4 bit)
- Full refresh time: <1s
- Total refresh power: 0.6W(typ.)
- Total standby power: 0.3W(typ.)
- Viewing angle: >170°

Working principle
This product is an E-paper device adopting the image display technology of Microencapsulated Electrophoretic Display, MED. The initial approach is to create tiny spheres, in which the charged color pigments are suspending in the transparent oil and would move depending on the electronic charge. The E-paper screen display patterns by reflecting the ambient light, so it has no background light requirement. Under sunshine, the E-paper screen still has high visibility with a wide viewing angle of 180 degree. It is the ideal choice for E-reading.
How to use
Working with Windows PC
- Connect 9.7inch e-paper to IT8951 driver board as below

- Connect driver board to PC by USB cable
- Download and open test software E-LINK-TCON-DEMO
- Click connect as below

- Check option "AutoSet", then click "Open File" to open one picture for display. Browse diagram will be opened, and you should click "OK"

- Click "display" to refresh the picture

Note: Source code of E-LINK-TCON-DEMO is unavailable unless you signed SLA. if require, please contact with Waveshare Team.
Working with Raspberry Pi
- Hardware connection

- Make sure you have switched the sail switch to SPI mode

- Install BCM2835 libraries to your Raspberry Pi, you can download the newest bcm2835 library from its official website http://www.airspayce.com/mikem/bcm2835/
Copy the library you download to Raspberry Pi and install it withe commands below. You can also following the instruction on its website above
tar zxvf bcm2835-1.xx.tar.gz
cd bcm2835-1.xx
./configure
make
sudo make check
sudo make install
- Download Demo code and copy to your Raspberry Pi. Extract and run it with the commands below in your Raspberry Pi
tar zxvf IT8951.tar.gz
cd IT8951
make clean
make
sudo ./IT8951 0 0 01.bmp
This demo code supports display general BMP pictures directly, if you find that your BMP picture cannot be displayed, please open it on Windows PC with Paint software (Windows APP), save as BMP and try again.
The command ;./IT8951 0 0 01.bmp', the first two parameters is X and Y coordinate of picture's left-top, 01.bmp is the file name of picture
Working with STM32
Because IT8951 will cost big size of RAM, some of STM32 cannot support without external SDRAM device. So we here use Open429I as test board, Open429I integrates IS42S16400J (64-MBIT) SDRAM,has full memory to drive the 9.7inch e-paper.
Working with STM32, you can use SPI, I80 or I2C interface. SPI is simple and need a few of GPIO, its speed can also meet the requirement of most applications. I80 is also simple and fast, however, it need to use lots of GPIO. I2C is every slow, which we don't recommend.
SPI
1) Hardware connection
| IT8951 | STM32 | Description |
|---|---|---|
| 5V | 5V | 5V Power input |
| GND | GND | Ground |
| MISO | PE13 | Data output |
| MOSI | PE14 | Data input |
| SCK | PE13 | Clock input |
| CS | PE11 | Chip select (Low active) |
| RST | PC5 | Reset (Low for reset) |
| HRDY | PA7 | BUSY state output (Low for busy) |
2) Set the switch to SPI mode
3) Download demo code to refresh picture
You can download the demo code here
Open the project with keil :Open429I-C-IT8951-Demo\Project\9.7-IT8951\MDK-ARM\Project.uvproj
Compile it, then open IT8951.h, check if SPI mode is enabled. Compile it again and download to your board. After downloading, the

The information will be printed as below (115200, 8N1)

I80
1) Hardware connection
| IT8951 | STM32 | Description |
|---|---|---|
| Vcc | 5V | 5V Power input |
| GND | GND | Ground |
| DBUS0~DBUS15 | PB0~PB15 | Data pins |
| HWE | PC1 | Write enable (Low active) |
| D/C | PC7 | Data/Command (Low for command) |
| CSEL | PC6 | Chip select (Low active) |
| HRD | PC3 | Read eenable (Low for active) |
| RST | PC0 | Reset (Low for reset) |
| BUSY | PA7 | Busy state output (Low for busy) |
2)Set the switch to I80 mode

3) Display with demo code
You can download the demo code here
Open project and change set the interface to I80.

Resources
Schematic
Demo code
Datasheet
Software
Supports
Support
If you require technical support, please go to the Support page and open a ticket.