
Difference between revisions of "7inch LCD for Pi"
m (Text replace - "Service02" to "service00") |
|||
| (37 intermediate revisions by 4 users not shown) | |||
| Line 1: | Line 1: | ||
| + | <div class="wiki-pages jet-green-color"> | ||
| + | {{DISPLAYTITLE:7inch DPI LCD}} | ||
{{Infobox item | {{Infobox item | ||
| − | |img=[[File:7inch-LCD-for-Pi-1.jpg|300px|link= | + | |name=7inch DPI LCD |
| − | |caption= | + | |img=[[File:7inch-LCD-for-Pi-1.jpg|300px|{{Amazon_nolink|default={{#ifeq: {{#urlget:amazon|0}}|{{#urlget:Amazon|0}}| default|}}|url=link=https://www.waveshare.com/7inch-lcd-for-pi.htm}}]] |
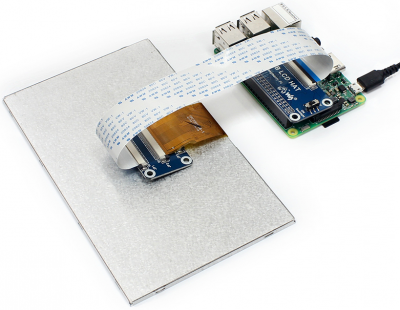
| + | |caption=1024 x 600, 7inch IPS Display for Raspberry Pi, DPI interface, no Touch | ||
|platform=Raspberry Pi | |platform=Raspberry Pi | ||
|category=[[:Category:OLEDs / LCDs|OLEDs / LCDs]], [[:Category:LCD|LCD]], [[:Category:Raspberry Pi LCD|Raspberry Pi LCD]] | |category=[[:Category:OLEDs / LCDs|OLEDs / LCDs]], [[:Category:LCD|LCD]], [[:Category:Raspberry Pi LCD|Raspberry Pi LCD]] | ||
|brand=Waveshare | |brand=Waveshare | ||
| − | |{{#urlget:amazon|default}}=display | + | |{{#ifeq: {{#urlget:amazon|0}}|{{#urlget:Amazon|0}}| default|}}=display |
|website_cn=[https://www.waveshare.net/shop/7inch-LCD-for-Pi.htm 7inch DPI LCD] | |website_cn=[https://www.waveshare.net/shop/7inch-LCD-for-Pi.htm 7inch DPI LCD] | ||
| − | |website_en=[https://www.waveshare.com/7inch-lcd-for-pi.htm 7inch DPI LCD] | + | |website_en=[https://www.waveshare.com/7inch-lcd-for-pi.htm?amazon 7inch DPI LCD] |
| − | |interface1 | + | |interface1=DPI |
| − | |||
|related= | |related= | ||
{{Product List|Mini PC/Raspberry Pi/Displays}} | {{Product List|Mini PC/Raspberry Pi/Displays}} | ||
}} | }} | ||
== '''Introduction''' == | == '''Introduction''' == | ||
| − | + | 1024 x 600, 7inch IPS Display for Raspberry Pi, DPI interface, no Touch. | |
| − | |||
| − | |||
== '''Features'''== | == '''Features'''== | ||
| − | * 7-inch IPS screen | + | * 7-inch IPS screen with a hardware resolution of 1024 × 600. |
| − | * Design based on Raspberry Pi 40pin GPIO interface | + | * Design based on Raspberry Pi 40pin GPIO interface. |
| − | * Drive LCD via DPI interface of Raspberry Pi | + | * Drive LCD via the DPI interface of Raspberry Pi. |
| − | * Supports operating systems like Raspberry Pi OS/Ubuntu | + | * Supports operating systems like Raspberry Pi OS/Ubuntu. |
| − | * Backlight control to lower power consumption | + | * Backlight control to lower power consumption. |
| − | * Compact size, suit for various projects | + | * Compact size, suit for various projects. |
| − | 【Note】This LCD can only be used for displaying, if you require a touchscreen, please purchase [https://www.waveshare.com/7inch-hdmi-lcd-c.htm 7inch HDMI LCD(C)(capacitive)] or [https://www.waveshare.com/7inch-hdmi-lcd.htm 7inch HDMI LCD(resistive)] | + | 【Note】This LCD can only be used for displaying, if you require a touchscreen, please purchase [https://www.waveshare.com/7inch-hdmi-lcd-c.htm 7inch HDMI LCD(C)(capacitive)] or [https://www.waveshare.com/7inch-hdmi-lcd.htm 7inch HDMI LCD(resistive)]. |
== '''Working with Raspberry Pi''' == | == '''Working with Raspberry Pi''' == | ||
=== Hardware connection === | === Hardware connection === | ||
| − | + | 1. Connect the RGB LCD HAT to the JP1 socket on RGB 50P TO 40/50P adapter with an FFC cable (white).<br/> | |
| − | + | 2. Connect the FPC cable (golden) on LCD to the JP2 socket on RGB 50P TO 40/50P adapter.<br/> | |
| − | : Note: When connecting, please open the black connector first, and then gently insert the cable. As shown below: | + | : Note: When connecting, please open the black connector first, and then gently insert the cable. As shown below:<br/> |
: [[File:7inch-LCD-for-Pi-Manual01.png|400px]] | : [[File:7inch-LCD-for-Pi-Manual01.png|400px]] | ||
: [[File:7inch-lcd-for-pi-manual-1.jpg|800px]] | : [[File:7inch-lcd-for-pi-manual-1.jpg|800px]] | ||
| Line 38: | Line 38: | ||
=== Software settings === | === Software settings === | ||
If you don't know the difference between the two branches of Raspberry Pi OS, you can check the following introduction [[#Introducing the Raspberry Pi OS fork]] | If you don't know the difference between the two branches of Raspberry Pi OS, you can check the following introduction [[#Introducing the Raspberry Pi OS fork]] | ||
| − | ==== For Raspberry Pi OS Bullseye branch ==== | + | ==== For Raspberry Pi OS Bookworm and Bullseye branch ==== |
Please download the latest version of the image from the [https://www.raspberrypi.com/software/operating-systems/ Raspberry Pi official website]. | Please download the latest version of the image from the [https://www.raspberrypi.com/software/operating-systems/ Raspberry Pi official website]. | ||
1. Download the compressed file to the PC, and extract the img file.<br /> | 1. Download the compressed file to the PC, and extract the img file.<br /> | ||
| − | 2. Connect the TF card to the PC and use [https:// | + | 2. Connect the TF card to the PC and use [https://files.waveshare.com/upload/d/d7/Panasonic_SDFormatter.zip SDFormatter] to format the TF card.<br /> |
| − | 3. Open the [https:// | + | 3. Open the [https://files.waveshare.com/upload/7/76/Win32DiskImager.zip Win32DiskImager] software, select the system image prepared in step 1, and click write to burn the system image.<br /> |
| − | 4. After the programming is completed, open the config.txt file in the root directory of the TF card, add the following code at the end of config.txt and save it | + | 4. After the programming is completed, open the config.txt file in the root directory of the TF card, add the following code at the end of config.txt, and save it. |
<pre> | <pre> | ||
dtoverlay=vc4-kms-v3d | dtoverlay=vc4-kms-v3d | ||
dtoverlay=vc4-kms-DPI-7inch | dtoverlay=vc4-kms-DPI-7inch | ||
| + | dtoverlay=waveshare-7dpi | ||
</pre> | </pre> | ||
| − | 5. Download the [https:// | + | 5. Download the [https://files.waveshare.com/wiki/7inch%20DPI%20LCD/7DPI-DTBO.zip 7inch DPI LCD-KMS display file] and put the two dtbo files in the /boot/overlays directory of the TF card, and eject the TF card safely.<br /> |
6. Turn on the LCD backlight switch.<br /> | 6. Turn on the LCD backlight switch.<br /> | ||
7. Insert the TF card into the Raspberry Pi, power on the Raspberry Pi, and wait for more than ten seconds to display normally. | 7. Insert the TF card into the Raspberry Pi, power on the Raspberry Pi, and wait for more than ten seconds to display normally. | ||
| Line 71: | Line 72: | ||
2. Turn on the LCD backlight switch.<br /> | 2. Turn on the LCD backlight switch.<br /> | ||
3. Insert the TF card into the Raspberry Pi, power on the Raspberry Pi, and wait for more than ten seconds to display normally.<br /> | 3. Insert the TF card into the Raspberry Pi, power on the Raspberry Pi, and wait for more than ten seconds to display normally.<br /> | ||
| − | Note: If the display is abnormal, please try to adjust the VCOM voltage, and be careful not to stay for more than 10 seconds when the display is abnormal. (subject to the actual display effect) | + | Note: If the display is abnormal, please try to adjust the VCOM voltage, and be careful not to stay for more than 10 seconds when the display is abnormal. (subject to the actual display effect.) |
| − | ===Introducing the Raspberry Pi OS | + | ===Introducing the Raspberry Pi OS=== |
| − | On December 2, 2021, the Raspberry Pi OS for Raspberry Pi split into two branches, the Buster branch and the Bullseye branch.<br /> | + | On December 2, 2021, the Raspberry Pi OS for Raspberry Pi split into two branches, the Buster branch, and the Bullseye branch.<br /> |
The Buster branch is a continuation of the old system, which is more stable and uses raspicam as the default camera subsystem.<br /> | The Buster branch is a continuation of the old system, which is more stable and uses raspicam as the default camera subsystem.<br /> | ||
The Bullseye branch adds some new features, including KMS as the default display driver and libcamera as the default camera subsystem.<br /> | The Bullseye branch adds some new features, including KMS as the default display driver and libcamera as the default camera subsystem.<br /> | ||
| − | [https://www.raspberrypi.com/software/operating-systems/ Image download address] | + | [https://www.raspberrypi.com/software/operating-systems/ Image download address]<br /> |
[[File:RASPBERRY-PI-OS-BUSTER-BULLSEYE-04-01.png|800px]]<br /> | [[File:RASPBERRY-PI-OS-BUSTER-BULLSEYE-04-01.png|800px]]<br /> | ||
More detailed information can be found at:<br /> | More detailed information can be found at:<br /> | ||
| Line 89: | Line 90: | ||
[https://downloads.raspberrypi.org/raspios_armhf/release_notes.txt Bullseye Release Notes] | [https://downloads.raspberrypi.org/raspios_armhf/release_notes.txt Bullseye Release Notes] | ||
| − | Notes:The above information was updated on January 24, 2022. Due to the frequent update of the Raspberry Pi image, when you see this information, the relevant information may be out of date. The actual performance of the image shall prevail. This is for reference only. | + | Notes: The above information was updated on January 24, 2022. Due to the frequent update of the Raspberry Pi image, when you see this information, the relevant information may be out of date. The actual performance of the image shall prevail. This is for reference only. |
== '''Resources''' == | == '''Resources''' == | ||
=== Documentation === | === Documentation === | ||
| − | * [ | + | * [https://files.waveshare.com/upload/8/8a/RGB-LCD-HAT-Schematic.pdf RGB LCD HAT Schematic] |
| − | * [ | + | * [https://files.waveshare.com/upload/e/ed/RGB50-50-40-Schematic.pdf Flat cable connector Schematic] |
| − | * [ | + | * [https://files.waveshare.com/upload/1/1a/7inch_1024X600_LCD_DS.pdf 7inch LCD 1024x600 datasheet] |
=== Software === | === Software === | ||
| − | *[ | + | *[https://files.waveshare.com/upload/d/d7/Panasonic_SDFormatter.zip Panasonic SDFormatter] |
| − | *[ | + | *[https://files.waveshare.com/upload/7/76/Win32DiskImager.zip Win32DiskImager] |
| − | *[ | + | *[https://files.waveshare.com/upload/5/56/Putty.zip PuTTY] |
=== General Tutorial Series === | === General Tutorial Series === | ||
* [[Raspberry Pi Tutorial Series]] | * [[Raspberry Pi Tutorial Series]] | ||
| − | |||
| − | |||
| − | |||
| − | |||
| − | |||
=='''FAQ'''== | =='''FAQ'''== | ||
{{FAQ|How to remove the colored squares of the GPU self-check when the Raspberry Pi is powered on? | {{FAQ|How to remove the colored squares of the GPU self-check when the Raspberry Pi is powered on? | ||
| Line 122: | Line 118: | ||
|Using 5V power supply, the working current is about 450mA when opening the blacklight, and the working current is about 60mA when closing the blacklight. | |Using 5V power supply, the working current is about 450mA when opening the blacklight, and the working current is about 60mA when closing the blacklight. | ||
}} | }} | ||
| − | + | {{FAQ|How to set long press touch on Raspberry Pi capacitive touch screen? | |
| − | == ''' | + | | |
| − | {{ | + | '''Test environment: 2022-04-04-raspios-bullseye-armhf 32-bit system'''<br/> |
| + | '''Supported models: Support Waveshare DSI LCD, DPI LCD and HDMI LCD capacitive touch screen series.''' | ||
| + | ===Software Installation=== | ||
| + | <source lang="c"> | ||
| + | wget https://files.waveshare.com/upload/1/18/Evdev-right-click-emulation.zip | ||
| + | unzip Evdev-right-click-emulation.zip | ||
| + | cd evdev-right-click-emulation | ||
| + | sudo apt install build-essential libevdev2 libevdev-dev | ||
| + | cd 'evdev-right-click-emulation' | ||
| + | sudo cp 'out/evdev-rce' '/usr/local/bin/' | ||
| + | sudo chmod +x '/usr/local/bin/evdev-rce' | ||
| + | </source> | ||
| + | Enter the command:<br/> | ||
| + | <pre>sudo evdev-rce</pre> | ||
| + | After running, you can touch and long press to realize the right-click function. | ||
| + | ====Set IP==== | ||
| + | <source lang="c"> | ||
| + | sudo usermod -G 'input' -a pi | ||
| + | echo 'uinput' | sudo tee -a /etc/modules | ||
| + | sudo nano /etc/udev/rules.d/99-uinput.rules | ||
| + | </source> | ||
| + | Add in 99-uinput.rules file.<br/> | ||
| + | <pre> | ||
| + | KERNEL=="uinput", MODE="0660", GROUP="input" | ||
| + | </pre> | ||
| + | save it and run it in the terminal.<br/> | ||
| + | <source lang="c"> | ||
| + | sudo udevadm control --reload-rules | ||
| + | sudo udevadm trigger | ||
| + | </source> | ||
| + | Then reboot:<br/> | ||
| + | <pre> | ||
| + | sudo reboot | ||
| + | </pre> | ||
| + | Run after reboot (no sudo needed at this point)<br/> | ||
| + | <pre> | ||
| + | evdev-rce | ||
| + | </pre> | ||
| + | After running, you can touch and long press to realize the right-click function.<br/> | ||
| + | ====Set Startup==== | ||
| + | Enter the terminal<br/> | ||
| + | <pre> | ||
| + | sudo mkdir ~/.config/autostart | ||
| + | sudo nano ~/.config/autostart/right_click.desktop | ||
| + | </pre> | ||
| + | Add the following in right_click.desktop.<br/> | ||
| + | <pre> | ||
| + | [Desktop Entry] | ||
| + | Version=1.0 | ||
| + | Type=Application | ||
| + | Name=evdev-rce | ||
| + | GenericName=Enable long-press-to-right-click gesture | ||
| + | Exec=env LONG_CLICK_INTERVAL=1000 LONG_CLICK_FUZZ=200 /usr/local/bin/evdev-rce | ||
| + | Terminal=true | ||
| + | StartupNotify=false | ||
| + | #If you want to modify the sensitivity, you can modify the size of the two parameters, LONG_CLICK_INTERVAL=1000 LONG_CLICK_FUZZ=200. | ||
| + | </pre> | ||
| + | ||}} | ||
| + | {{FAQ|What is the refresh rate of this display? | ||
| + | |60Hz | ||
| + | ||}} | ||
| + | {{FAQ|Is this screen not auto-sleeping, or is it necessary to execute a command to put it to sleep? | ||
| + | |Depends on the system, if the system has hibernation, then the screen will also be black. If it's the official Raspberry Pi system, the default ten minutes or so without action is to have hibernation. | ||
| + | ||}} | ||
| + | {{FAQ|Does this screen support PWM brightness adjustment? | ||
| + | |No. | ||
| + | ||}} | ||
| + | {{FAQ|The operating current of the 7inch DPI LCD? | ||
| + | |5V power supply, the on-backlight operating current is about 450mA and the off-backlight operating current is about 60mA. | ||
| + | ||}} | ||
| + | ==Support== | ||
| + | {{Servicebox1}} | ||
[[Category:OLEDs / LCDs|OLEDs / LCDs]] [[Category:LCD|LCD]] [[Category:Raspberry Pi|Raspberry Pi]] [[Category:Raspberry Pi LCD|Raspberry Pi LCD]] | [[Category:OLEDs / LCDs|OLEDs / LCDs]] [[Category:LCD|LCD]] [[Category:Raspberry Pi|Raspberry Pi]] [[Category:Raspberry Pi LCD|Raspberry Pi LCD]] | ||
| + | </div> | ||
Latest revision as of 11:36, 15 January 2024
| ||

Introduction
1024 x 600, 7inch IPS Display for Raspberry Pi, DPI interface, no Touch.
Features
- 7-inch IPS screen with a hardware resolution of 1024 × 600.
- Design based on Raspberry Pi 40pin GPIO interface.
- Drive LCD via the DPI interface of Raspberry Pi.
- Supports operating systems like Raspberry Pi OS/Ubuntu.
- Backlight control to lower power consumption.
- Compact size, suit for various projects.
【Note】This LCD can only be used for displaying, if you require a touchscreen, please purchase 7inch HDMI LCD(C)(capacitive) or 7inch HDMI LCD(resistive).
Working with Raspberry Pi
Hardware connection
1. Connect the RGB LCD HAT to the JP1 socket on RGB 50P TO 40/50P adapter with an FFC cable (white).
2. Connect the FPC cable (golden) on LCD to the JP2 socket on RGB 50P TO 40/50P adapter.
- Note: When connecting, please open the black connector first, and then gently insert the cable. As shown below:


Software settings
If you don't know the difference between the two branches of Raspberry Pi OS, you can check the following introduction #Introducing the Raspberry Pi OS fork
For Raspberry Pi OS Bookworm and Bullseye branch
Please download the latest version of the image from the Raspberry Pi official website.
1. Download the compressed file to the PC, and extract the img file.
2. Connect the TF card to the PC and use SDFormatter to format the TF card.
3. Open the Win32DiskImager software, select the system image prepared in step 1, and click write to burn the system image.
4. After the programming is completed, open the config.txt file in the root directory of the TF card, add the following code at the end of config.txt, and save it.
dtoverlay=vc4-kms-v3d
dtoverlay=vc4-kms-DPI-7inch
dtoverlay=waveshare-7dpi
5. Download the 7inch DPI LCD-KMS display file and put the two dtbo files in the /boot/overlays directory of the TF card, and eject the TF card safely.
6. Turn on the LCD backlight switch.
7. Insert the TF card into the Raspberry Pi, power on the Raspberry Pi, and wait for more than ten seconds to display normally.
For Raspberry Pi OS Buster branch and Ubuntu system
1. Open the config.txt file in the root directory of the TF card, add the following code at the end of config.txt, save and safely eject the TF card.
[pi4]
dpi_timings=1024 1 40 48 128 600 1 13 3 45 0 0 0 60 0 37000000 6

[all]
dtoverlay=dpi24
enable_dpi_lcd=1
display_default_lcd=1
dpi_group=2
dpi_mode=87
dpi_output_format=0x6f005
hdmi_cvt 1024 600 60 6 0 0 0
disable_overscan=1
2. Turn on the LCD backlight switch.
3. Insert the TF card into the Raspberry Pi, power on the Raspberry Pi, and wait for more than ten seconds to display normally.
Note: If the display is abnormal, please try to adjust the VCOM voltage, and be careful not to stay for more than 10 seconds when the display is abnormal. (subject to the actual display effect.)
Introducing the Raspberry Pi OS
On December 2, 2021, the Raspberry Pi OS for Raspberry Pi split into two branches, the Buster branch, and the Bullseye branch.
The Buster branch is a continuation of the old system, which is more stable and uses raspicam as the default camera subsystem.
The Bullseye branch adds some new features, including KMS as the default display driver and libcamera as the default camera subsystem.
Image download address

More detailed information can be found at:
Notes: The above information was updated on January 24, 2022. Due to the frequent update of the Raspberry Pi image, when you see this information, the relevant information may be out of date. The actual performance of the image shall prevail. This is for reference only.
Resources
Documentation
Software
General Tutorial Series
FAQ
disable_splash=1
{{{5}}}
{{{5}}}
{{{5}}}
Test environment: 2022-04-04-raspios-bullseye-armhf 32-bit system
Supported models: Support Waveshare DSI LCD, DPI LCD and HDMI LCD capacitive touch screen series.
Software Installation
wget https://files.waveshare.com/upload/1/18/Evdev-right-click-emulation.zip
unzip Evdev-right-click-emulation.zip
cd evdev-right-click-emulation
sudo apt install build-essential libevdev2 libevdev-dev
cd 'evdev-right-click-emulation'
sudo cp 'out/evdev-rce' '/usr/local/bin/'
sudo chmod +x '/usr/local/bin/evdev-rce'
Enter the command:
sudo evdev-rce
After running, you can touch and long press to realize the right-click function.
Set IP
sudo usermod -G 'input' -a pi
echo 'uinput' | sudo tee -a /etc/modules
sudo nano  /etc/udev/rules.d/99-uinput.rules
Add in 99-uinput.rules file.
KERNEL=="uinput", MODE="0660", GROUP="input"
save it and run it in the terminal.
sudo udevadm control --reload-rules
sudo udevadm trigger
Then reboot:
sudo reboot
Run after reboot (no sudo needed at this point)
evdev-rce
After running, you can touch and long press to realize the right-click function.
Set Startup
Enter the terminal
sudo mkdir ~/.config/autostart
sudo nano ~/.config/autostart/right_click.desktop
Add the following in right_click.desktop.
[Desktop Entry]
Version=1.0
Type=Application
Name=evdev-rce
GenericName=Enable long-press-to-right-click gesture
Exec=env LONG_CLICK_INTERVAL=1000 LONG_CLICK_FUZZ=200  /usr/local/bin/evdev-rce
Terminal=true
StartupNotify=false
#If you want to modify the sensitivity, you can modify the size of the two parameters, LONG_CLICK_INTERVAL=1000 LONG_CLICK_FUZZ=200.
{{{5}}}
{{{5}}}
{{{5}}}
{{{5}}}
{{{5}}}
Support
Technical Support
If you need technical support or have any feedback/review, please click the Submit Now button to submit a ticket, Our support team will check and reply to you within 1 to 2 working days. Please be patient as we make every effort to help you to resolve the issue.
Working Time: 9 AM - 6 AM GMT+8 (Monday to Friday)