
Difference between revisions of "7inch DSI LCD (with cam)"
(→FAQ) |
|||
| (24 intermediate revisions by 4 users not shown) | |||
| Line 1: | Line 1: | ||
| + | <div class="wiki-pages jet-green-color"> | ||
{{Infobox item | {{Infobox item | ||
|name1 = 7inch DSI LCD (with cam) | |name1 = 7inch DSI LCD (with cam) | ||
|name2 = 7inch DSI LCD (with cam and case) | |name2 = 7inch DSI LCD (with cam and case) | ||
| − | |img=[[File:7inch-DSI-LCD-with-cam-1.jpg|250px|{{Amazon_nolink|default={{#urlget:amazon|default}}|url=link=https://www.waveshare.com/7inch-dsi-lcd-with-cam.htm}}]] | + | |img=[[File:7inch-DSI-LCD-with-cam-1.jpg|250px|{{Amazon_nolink|default={{#ifeq: {{#urlget:amazon|0}}|{{#urlget:Amazon|0}}| default|}}|url=link=https://www.waveshare.com/7inch-dsi-lcd-with-cam.htm}}]] |
| − | |img2=[[File:7inch-DSI-LCD-with-cam-and-case-1.jpg|250px|{{Amazon_nolink|default={{#urlget:amazon|default}}|url=link=https://www.waveshare.com/7inch-dsi-lcd-with-cam-and-case.htm}}]] | + | |img2=[[File:7inch-DSI-LCD-with-cam-and-case-1.jpg|250px|{{Amazon_nolink|default={{#ifeq: {{#urlget:amazon|0}}|{{#urlget:Amazon|0}}| default|}}|url=link=https://www.waveshare.com/7inch-dsi-lcd-with-cam-and-case.htm}}]] |
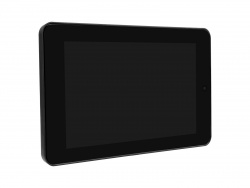
|caption=7inch capacitive Touch Screen LCD for Raspberry Pi, DSI Interface with 5MP camera | |caption=7inch capacitive Touch Screen LCD for Raspberry Pi, DSI Interface with 5MP camera | ||
|caption2=7inch capacitive Touch Screen LCD for Raspberry Pi, DSI Interface, with 5MP camera and protection case | |caption2=7inch capacitive Touch Screen LCD for Raspberry Pi, DSI Interface, with 5MP camera and protection case | ||
| Line 9: | Line 10: | ||
|category=[[:Category:OLEDs / LCDs|OLEDs / LCDs]], [[:Category:LCD|LCD]], [[:Category:Raspberry Pi LCD|Raspberry Pi LCD]] | |category=[[:Category:OLEDs / LCDs|OLEDs / LCDs]], [[:Category:LCD|LCD]], [[:Category:Raspberry Pi LCD|Raspberry Pi LCD]] | ||
|brand=Waveshare | |brand=Waveshare | ||
| − | |{{#urlget:amazon|default}}=display | + | |{{#ifeq: {{#urlget:amazon|0}}|{{#urlget:Amazon|0}}| default|}}=display |
|website_cn=[https://www.waveshare.net/shop/ 中文官网] | |website_cn=[https://www.waveshare.net/shop/ 中文官网] | ||
|website_en=[https://www.waveshare.com/7inch-dsi-lcd-with-cam.htm 7inch DSI LCD (with cam)], [https://www.waveshare.com/7inch-dsi-lcd-with-cam-and-case.htm 7inch DSI LCD (with cam and case)] | |website_en=[https://www.waveshare.com/7inch-dsi-lcd-with-cam.htm 7inch DSI LCD (with cam)], [https://www.waveshare.com/7inch-dsi-lcd-with-cam-and-case.htm 7inch DSI LCD (with cam and case)] | ||
| Line 18: | Line 19: | ||
<div class="tabber"> | <div class="tabber"> | ||
<div class="tabbertab" title="Introduction"> | <div class="tabbertab" title="Introduction"> | ||
| − | |||
| − | |||
| − | |||
{{7inch DSI LCD with cam User Manual}} | {{7inch DSI LCD with cam User Manual}} | ||
</div> | </div> | ||
<div class="tabbertab" title="Resources"> | <div class="tabbertab" title="Resources"> | ||
| − | + | <!-- | |
| − | ==''' | + | ===Setting up Long-press on the Right-click for Raspberry Pi=== |
| + | '''Test environment: 2022-04-04-raspios-bullseye-armhf 32-bit system'''<br/> | ||
| + | '''Supported models: Support Waveshare DSI LCD, DPI LCD and HDMI LCD capacitive touch screen series.''' | ||
| + | <source lang="c"> | ||
| + | wget https://www.waveshare.com/w/upload/1/18/Evdev-right-click-emulation.zip | ||
| + | unzip Evdev-right-click-emulation.zip | ||
| + | cd evdev-right-click-emulation | ||
| + | sudo apt install build-essential libevdev2 libevdev-dev | ||
| + | cd 'evdev-right-click-emulation' | ||
| + | sudo cp 'out/evdev-rce' '/usr/local/bin/' | ||
| + | sudo chmod +x '/usr/local/bin/evdev-rce' | ||
| + | </source> | ||
| + | Enter the command:<br/> | ||
| + | <pre>sudo evdev-rce</pre> | ||
| + | After running, you can touch and long press to realize the right-click function. | ||
| + | ====Set IP==== | ||
| + | <source lang="c"> | ||
| + | sudo usermod -G 'input' -a pi | ||
| + | echo 'uinput' | sudo tee -a /etc/modules | ||
| + | sudo nano /etc/udev/rules.d/99-uinput.rules | ||
| + | </source> | ||
| + | Add in 99-uinput.rules file.<br/> | ||
| + | <pre> | ||
| + | KERNEL=="uinput", MODE="0660", GROUP="input" | ||
| + | </pre> | ||
| + | save it and run it in the terminal.<br/> | ||
| + | <source lang="c"> | ||
| + | sudo udevadm control --reload-rules | ||
| + | sudo udevadm trigger | ||
| + | </source> | ||
| + | Then reboot:<br/> | ||
| + | <pre> | ||
| + | sudo reboot | ||
| + | </pre> | ||
| + | Run after reboot (no sudo needed at this point)<br/> | ||
| + | <pre> | ||
| + | evdev-rce | ||
| + | </pre> | ||
| + | After running, you can touch and long press to realize the right-click function.<br/> | ||
| + | ====Setting up Auto-start on Boot==== | ||
| + | Enter the terminal:<br/> | ||
| + | <pre> | ||
| + | sudo mkdir ~/.config/autostart | ||
| + | sudo nano ~/.config/autostart/right_click.desktop | ||
| + | </pre> | ||
| + | Add the following in right_click.desktop.<br/> | ||
| + | <pre> | ||
| + | [Desktop Entry] | ||
| + | Version=1.0 | ||
| + | Type=Application | ||
| + | Name=evdev-rce | ||
| + | GenericName=Enable long-press-to-right-click gesture | ||
| + | Exec=env LONG_CLICK_INTERVAL=1000 LONG_CLICK_FUZZ=200 /usr/local/bin/evdev-rce | ||
| + | Terminal=true | ||
| + | StartupNotify=false | ||
| + | #If you want to modify the sensitivity, you can modify the size of the two parameters, LONG_CLICK_INTERVAL=1000 LONG_CLICK_FUZZ=200. | ||
| + | </pre> | ||
| + | --> | ||
| + | <!-- | ||
| + | ==Resources== | ||
===External guides=== | ===External guides=== | ||
| − | *[https:// | + | *[https://files.waveshare.com/upload/1/18/7inch-DSI-TOUCH-DS.pdf Touch drawing] |
=== Software === | === Software === | ||
| − | *[ | + | *[https://files.waveshare.com/upload/d/d7/Panasonic_SDFormatter.zip Panasonic SDFormatter] |
| − | *[ | + | *[https://files.waveshare.com/upload/7/76/Win32DiskImager.zip Win32DiskImager] |
| − | *[ | + | *[https://files.waveshare.com/upload/5/56/Putty.zip PuTTY] |
</div> | </div> | ||
<div class="tabbertab" title="FAQ"> | <div class="tabbertab" title="FAQ"> | ||
| + | --> | ||
| − | = | + | =FAQ= |
| + | <!-- | ||
{{FAQ|Cameras cannot work when using the 2021-10-30-raspios-bullseye-armhf image. | {{FAQ|Cameras cannot work when using the 2021-10-30-raspios-bullseye-armhf image. | ||
|Please configure as below and try to use the camera again. | |Please configure as below and try to use the camera again. | ||
<pre> | <pre> | ||
| − | sudo raspi-config | + | sudo raspi-config -> Choose Advanced Options -> Glamor -> Yes(Enabled) -> OK -> Finish -> Yes(Reboot) |
</pre> | </pre> | ||
| − | |||
}} | }} | ||
| + | --> | ||
| + | {{FAQ|What is the power consumption of the 7inch DSI LCD (with cam)? | ||
| + | | | ||
| + | 5V 500mA. | ||
| + | ||}} | ||
| + | {{FAQ|When using the Bookworm system with Pi5, encountering an issue where the DSI LCD is not displaying. How can this be resolved? | ||
| + | | | ||
| + | Check the system version using "uname --all". If it's kernel version 6.6.20, run "sudo rpi-update pulls/6050" to fix it.<br> | ||
| + | Note: Take care to back up any important data in your image before updating in case there is a regression. | ||
| + | ||}} | ||
| − | = | + | =Support= |
| − | + | {{Servicebox1}} | |
| − | |||
| − | |||
| − | |||
| − | |||
| − | |||
| − | {{ | ||
[[Category:OLEDs / LCDs|OLEDs / LCDs]] [[Category:LCD|LCD]] [[Category:Raspberry Pi|Raspberry Pi]] [[Category:Raspberry Pi LCD|Raspberry Pi LCD]] | [[Category:OLEDs / LCDs|OLEDs / LCDs]] [[Category:LCD|LCD]] [[Category:Raspberry Pi|Raspberry Pi]] [[Category:Raspberry Pi LCD|Raspberry Pi LCD]] | ||
| + | </div> | ||
Latest revision as of 03:40, 19 March 2024
| ||
| ||

Features
- 7inch capacitive touch display screen, 800 x 480 hardware resolution.
- Capacitive touch panel, support 5-point touch.
- Toughened glass capacitive touch panel, hardness up to 6H.
- OV5647 camera, 500W pixels, 72.9° FOV, and the resolution is 2592×1944.
- Supports Pi5/4B/CM4/3B+/3A+/3B/CM3/CM3+/2B/B+/A+.
- Directly drive the LCD by the DSI interface on the Raspberry Pi, with up to 60Hz refreshing rate.
- Drive the camera directly through the Raspberry Pi's CSI interface, video frame rate support 1920×1080p@30, 1280×720p@60, 640×480p@60, 640×480p@90.
- When working with Raspberry Pi, support Raspberry Pi OS / Ubuntu / Kali and Retropie, driver-free.
- Support brightness adjustable through software control.
Hardware Connection
Working with Pi 4B/3B+/3A+/3B/2B/B+/A+
1) Connect the DSI interface of the 7-inch DSI LCD to the DSI interface of Raspberry Pi through the 15PIN FPC cable.
2) Connect the CSI interface of the display to the CSI interface of the Raspberry Pi board through the 15PIN FFC cable.
3) Use the 2PIN power cable to connect the power interface of the LCD to the 40PIN GPIO interface of the Raspberry Pi, as below:

4) For easy use, you can fix the Raspberry Pi on the backside of the 7-inch DSI LCD with screws.
The installation effect is shown in the following figure:

Working with Pi 5/CM4/CM3+/CM3
1. Connect the LCD to the 22PIN DSI1 interface of the Raspberry Pi with a DSI-Cable-12cm.
2. Connect the camera interface to the 22PIN CSI0 interface of the Raspberry Pi with a Pi5-Camera-Cable.
3. Connect the power port of the LCD to the 40PIN GPIO headers of the Raspberry Pi with a 2PIN power cable.
4. For convenience, you can fix the Raspberry Pi 5 on the back of the 7inch DSI LCD with screws, as shown below:

Software Setting
Raspberry Pi OS Imager Insallation
For Raspberry Pi OS/Ubuntu/Kali and Retropie system:
- 1. Connect the TF card to the PC, download and use Raspberry Pi Imager to program the corresponding system.

- 2. After installing the imager, open the "config.txt" file on the TF card root directory, add the following codes at the end of "config.txt", and then safely remove the TF card.
Note: as there are two MIPI DSI interfaces on the Pi5/CM4/CM3+/CM3, please pay attention to using the correct DSI interface and commands, and the DSI1 interface is recommended.
dtoverlay=vc4-kms-v3d
dtoverlay=ov5647
#DSI1 Use
dtoverlay=vc4-kms-dsi-7inch
#DSI0 Use
#dtoverlay=vc4-kms-dsi-7inch,dsi0
- 3. Insert the TF card into the Raspberry Pi, power it up, and wait for a few seconds for the display. Once the system boots up, you should be able to interact with it normally, including touchscreen functionality.
Backlight Control
WaveShare provides the corresponding demo for the application (only supports Bookworm and Bullseye systems). Users can install it by the following commands:
wget https://files.waveshare.com/upload/f/f4/Brightness.zip
unzip Brightness.zip
cd Brightness
sudo chmod +x install.sh
./install.sh
After installation, you can open it: Menu -》Accessories -》Brightness:

In addition, you can also input the following commands to control the backlight brightness:
echo X | sudo tee /sys/class/backlight/*/brightness
Where X indicates any number from 0 to 255. 0 means the backlight is the darkest, and 255 means the backlight is the brightest. For example:
echo 100 | sudo tee /sys/class/backlight/*/brightness
echo 0 | sudo tee /sys/class/backlight/*/brightness
echo 255 | sudo tee /sys/class/backlight/*/brightness
Sleep
Run the following commands on the Raspberry Pi terminal, and the screen will enter sleep mode:
xset dpms force off
The above command is only for Bullseye and Buster systems.
Disable Touching
If you want to disable the touch function, you can modify the config.txt file, add the following line to the file, and reboot.
disable_touchscreen=1
Note: After adding the command, it needs to be restarted to take effect.
Using Camera
If you don't know the difference between the two branches of Raspberry Pi OS, you can check the following introduction #Introducing the Raspberry Pi OS fork
Raspberry Pi OS bullseye version
Bullseye image use libcamera stack, libcamera stack is used for driving cameras, and the camera interface is enabled by default.
To test the camera, you can use the following commands:
#libcamera-hello A simple "hello world" application that starts a camera preview stream and displays it on the screen.

libcamera-hello //will display a preview window for about 5 seconds.
libcamera-hello -t 0 //run the preview indefinitely, you can use Ctrl-C in the terminal to exit.

#libcamera-jpeg is a simple still image capture application for capturing high quality image
libcamera-jpeg -o test.jpg // display a preview for about 5 seconds, and then capture a full resolution JPEG image to the file test.jpg

#libcamera-still is a more sophisticated still image capture application, mainly to simulate raspistill
libcamera-still -o test.jpg //display a preview for about 5 seconds, and then capture a image to the file test.jpg

#libcamera-vid  is the video capture application. By default it uses the Raspberry Pi’s hardware H.264 encoder.
libcamera-vid -t 10000 -o test.h264 //Save a 10 second video to test.h264
vlc test.h264 //The resulting file can be played with vlc

#libcamera-raw  is like a video recording application except that it records raw Bayer frames directly from the sensor.
libcamera-raw -t 2000 -o test.raw //Save the 2s raw clip to file test.raw
For more information about the libcamera, pleaes refer to: libcamera and libcamera-apps
Note: If libcamera cannot work with some of Raspberry Pi boards, please configure as below for a try:
sudo raspi-config -> Advanced Options -> Glamor -> Yes(Enabled) -> Ok -> Finish -> Yes (Reboot)
Raspberry Pi OS buster fork with Ubuntu
The raspicam camera subsystem interface is used by default on these systems. The camera interface is enabled by default in Ubuntu. In the Raspberry Pi OS buster branch, you need to execute the following command to open the camera interface
sudo raspi-config -> Interface Options -> Camera -> Yes -> OK -> Finish -> Yes (Reboot)
The camera can be controlled with the following commands:
#raspistill is an application that runs a preview window and then acquires a high-resolution still image.
raspistill -o cam.jpg //A preview window is displayed for about 5 seconds, then the image is saved to cam.jpg
raspistill -vf -hf -o cam2.jpg //Flip Vertical and Flip Horizontal

#raspivid is a video shooting application.
raspivid -o vid.h264 //Save the 5 second video to test.h264
raspivid -o video.h264 -t 10000 //Record 10 second video
raspivid -vf -hf -o video.h264 -t 10000 //Flip Vertical and Flip Horizontal
More detailed information can be found at: Raspicam command
FAQ
5V 500mA.
{{{5}}}
Check the system version using "uname --all". If it's kernel version 6.6.20, run "sudo rpi-update pulls/6050" to fix it.
Note: Take care to back up any important data in your image before updating in case there is a regression.
{{{5}}}
Support
Technical Support
If you need technical support or have any feedback/review, please click the Submit Now button to submit a ticket, Our support team will check and reply to you within 1 to 2 working days. Please be patient as we make every effort to help you to resolve the issue.
Working Time: 9 AM - 6 AM GMT+8 (Monday to Friday)